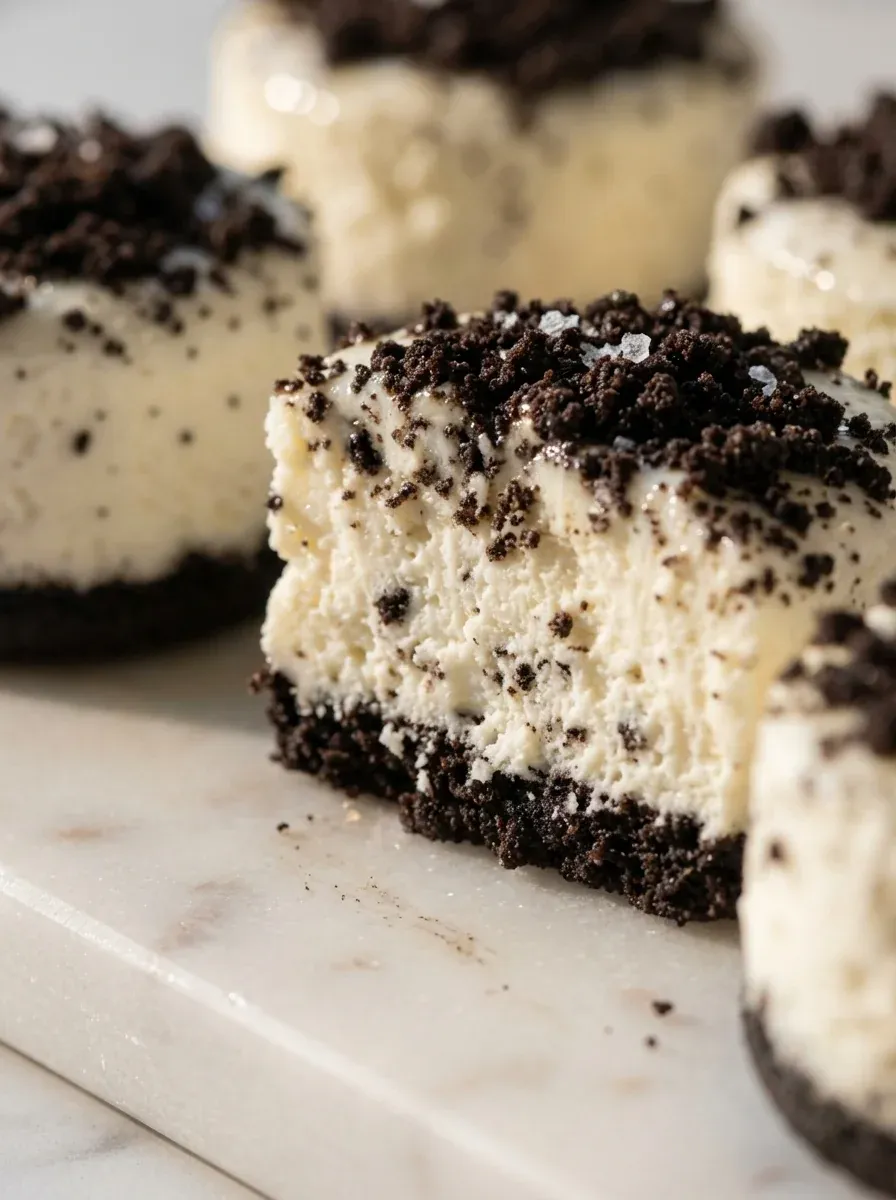
No-Bake Oreo Cheesecake Bites
Creamy, crunchy, and effortless Oreo cheesecake bites that melt in your mouth.
- Total time
- 15 min
- Servings
- 12 Servings
- Difficulty:
- Easy
Table of contents
Honestly, there’s something comforting about a dessert that doesn’t need a stove. I remember the first time I set these bites on a tray and watched the crumbs settle like soft snow. The scent of cocoa and cream mingles, and you feel a quiet joy as you plate them.
The essence of the dish
It’s the marriage of crunchy chocolate cookie and airy cheesecake, each bite offering a quick burst of sweet comfort.
A fun fact or historical angle
The original Oreo cookie debuted in 1912, and its popularity surged during the Great Depression as an affordable treat.
Flavor or sensory focus
Expect a cool, creamy mouthfeel contrasted by the faint crumbly snap of the cookie crust, with a whisper of cocoa on the palate.
You Must Know
- Keep the filling chilled
- Press the crust firmly
- Serve immediately after chilling
These pointers help you avoid a soggy base and ensure each bite holds together. I’ve learned that a little patience while the crust sets pays off when you serve them to guests. The result is a polished look without the fuss.
The story behind it
Originating from the classic American cheesecake, these bite‑size versions have become a staple at gatherings because they are easy to make and universally adored. The combination of crushed cookies and silky cheese has a timeless appeal that traces back to early 20th‑century dessert culture, where convenience met indulgence. This treat captures that heritage while fitting modern, no‑bake lifestyles.
Why You'll Love It
- No oven required, perfect for summer evenings
- Quick prep, under 20 minutes total
- Creamy texture balanced by crunchy crust
- Easy to freeze for later
Tips for success
- Never over‑mix the cream cheese or it may become grainy.
- Chill the crust for a few minutes before adding the filling.
- Use a gentle hand when piping to keep the topping even.
Professional secrets
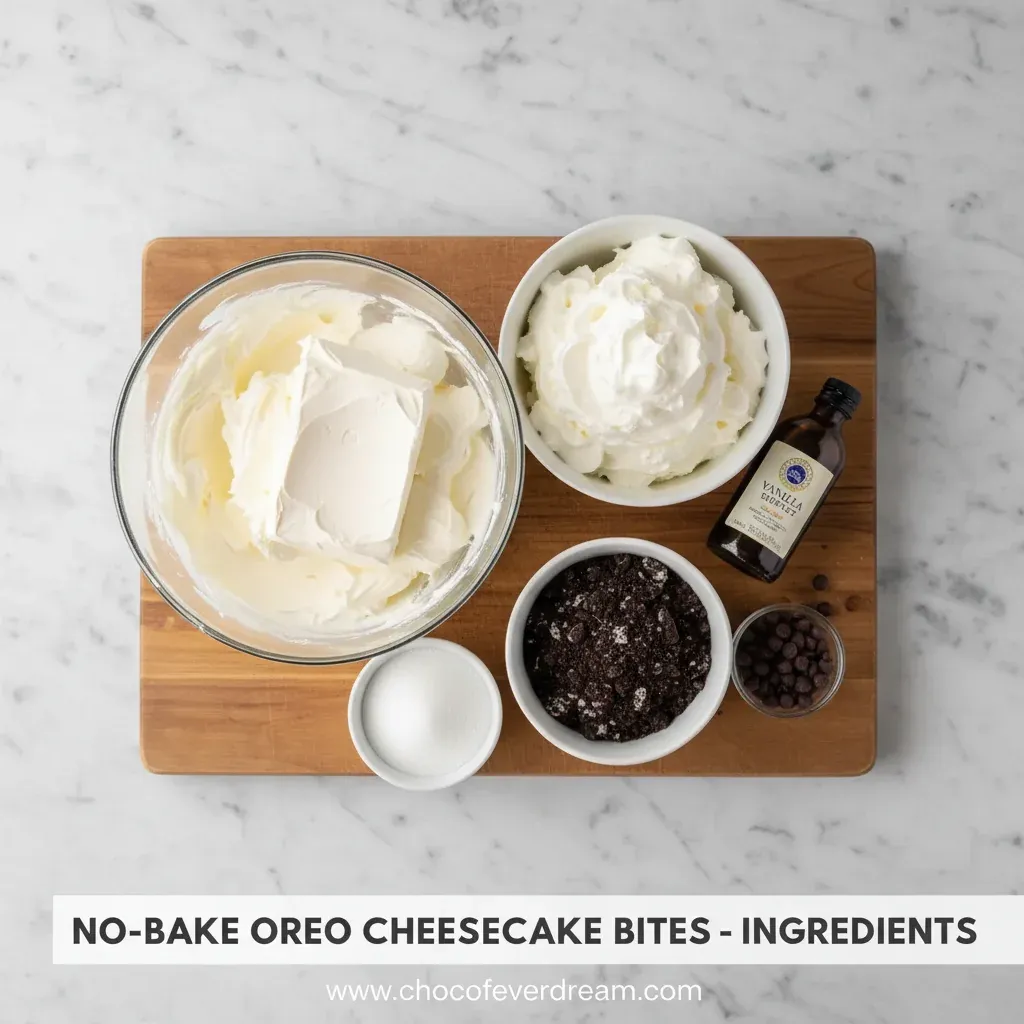
- Room‑temperature cream cheese blends flawlessly without lumps.
- A brief chill of the crust creates a barrier that prevents sogginess.
- Folding in whipped cream adds lift without extra heavy cream.
Common mistakes to avoid
- Over‑mixing the cream cheese leading to a grainy texture.
- Not pressing the crust firmly, causing it to crumble.
- Skipping the chill step, resulting in a runny filling.
Substitutions
- Cream cheese:* Neufchâtel cheese. Provides a slightly lighter texture, keep the same amount
- Oreo cookies:* Chocolate wafer cookies. Will change flavor profile to a deeper cocoa taste
Variations
- Spicy Version:* Add a pinch of cayenne pepper to the filling for a gentle heat.
- Mint Chocolate:* Mix a few drops of peppermint extract into the filling and garnish with chocolate curls.
Storage
Store in an airtight container in the refrigerator for up to three days.
Make ahead
Prepare the crusts and filling a day ahead, assemble the bites, and keep refrigerated until ready to serve.
Leftovers
Enjoy remaining bites straight from the fridge; they stay fresh and tasty for a couple of days.
Serving ideas
- Arrange bites on a decorative platter for parties.
- Serve with fresh fruit slices for a balanced dessert.
- Pair with a dollop of whipped cream for extra indulgence.
- Garnish each bite with a tiny mint leaf for a pop of color.
Allergy information
Contains dairy, gluten, and soy (from cookies).
No-Bake Oreo Cheesecake Bites
Creamy, crunchy, and effortless Oreo cheesecake bites that melt in your mouth.
- Prep time
- 15 min
- Total time
- 15 min
- Difficulty
- Easy
- Cuisine
- American
- Course
- Dessert
Ingredients
Crust
Filling
Topping
Instructions
- 1
Place the crushed Oreo cookies in a bowl, add melted butter, and stir until the mixture resembles wet sand.
- 2
Press the cookie mixture firmly into the bottom of mini silicone molds, creating an even layer.
- 3
In a separate bowl, beat the softened cream cheese with powdered sugar, lemon juice, and vanilla until smooth.
- 4
Gently fold in the heavy cream and whipped cream until the filling is light and airy.
- 5
Pipe or spoon the cheesecake filling onto the chilled crusts, smooth the tops, and refrigerate for at least 1 hour.
- 6
Before serving, drizzle melted chocolate or sprinkle chocolate shavings over each bite.
Nutrition per serving
- 120 kcal
- Calories
- 3 g
- Protein
- 12 g
- Carbs
- 7 g
- Fat
Tips & notes
- Make sure the crust is compact; a gentle press with the back of a spoon works well. - If the filling seems too soft, add a tablespoon of powdered sugar to firm it up. - Serve directly from the fridge for the best texture.
Frequently asked questions
Can I use gluten‑free cookies?
Yes, substitute regular Oreos with a gluten‑free chocolate sandwich cookie for a safe version.
How long can they be stored?
Refrigerated, they stay fresh for up to three days in an airtight container.
Do I need a food processor?
A plastic bag and rolling pin work fine; just crush the cookies into fine crumbs.
Can I make them dairy‑free?
Replace cream cheese with a dairy‑free cream cheese alternative and use coconut cream.
What size mold works best?
A standard 2‑inch silicone mini muffin mold gives the perfect bite‑size portion.
Is it okay to freeze them?
Absolutely; wrap individually and freeze for up to two months, then thaw before serving.
Tags:
Share:
Join our newsletter
New posts straight to your inbox. No spam, unsubscribe anytime.